Building this new rig has to happen in steps or stages. After removing some excess items from the camper (microwave, huge fridge, range hood) we were ready to take it to the AT Overland shop so they could begin the design and build of the chassis mount system. They needed to measure the floor frame and exterior size of the unit.
Meanwhile Mike drove the truck to Phoenix to sell the bed back to the dealership! B & N Auto Sales were great to work with in the purchase of our truck. They offered excellent pricing on the unit we wanted. They agreed to buy back the bed when we were ready! 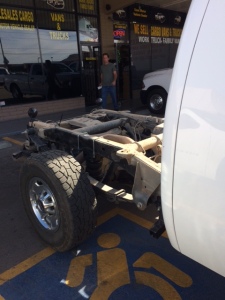
 They removed the bed and bumper and handed Mike a check. (we didn’t expect them to take the bumper- but we didn’t need it anyway ) Then he headed back to the shop in Prescott so AT Overland could work on the design of the aluminum mounting frame they would be making.
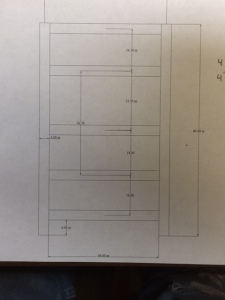 After a lot of discussion, a little bit of research and a few drawings- everyone was ready to start working. Here are some photos of the frame during its developmental phase.
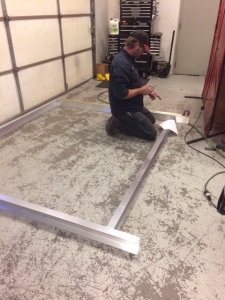
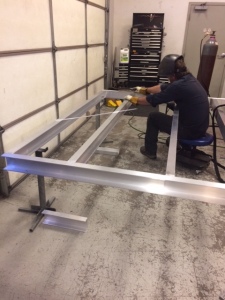

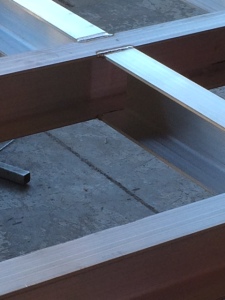
 This frame is made out aluminum I-beams which are welded together at each joint. It is made to match up with the chassis of the truck and also the frame of the camper. This will use the original attachment points of the truck bed. Additional beams correspond with the flooring frame of the camper. And some cross beams correspond with the outer walls of the camper The beams on the far outside will help support the custom storage boxes that will be built. The outside of the frame is 7’6″ which is the total width of the camper.
Here are a few photos of the first time the frame sits on the chassis!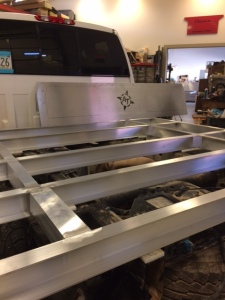
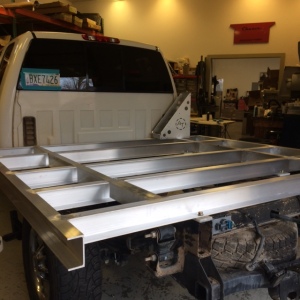
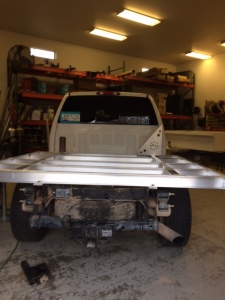
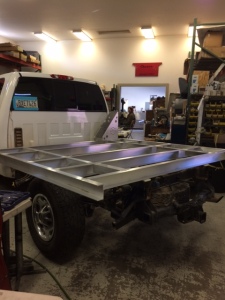 This frame is actually wider than it is long. ( this is a short bed truck and a short bed camper) The camper will sit perfectly on it and buckle down tightly. More to come on that part of the process soon! Keep watching. And if you are not subscribed to updates…. sign up below and you can get these emailed directly to you when they are posted!
Thanks for checking in to see this build take place. Here is a little movie of the welders at AT Overland working on our chassis mount camper frame.

Ah, so this is the build of my camper!
Nice setup. Should work well especially if you decide to cross some if the Andes. Enjoy
Thanks for following! This is slightly different than a flat bed mount. As we really want to save weight, we eliminated the tray of a flat bed. It is simply a lightweight, aluminum frame between the truck and camper. Keep watching! I think you’ll like this!
Well this just took an interesting turn. I wasn’t expecting a flat bed conversion. When you modify, you really go for it.. Brilliant!!!!