(I know that a few of you are waiting to hear about Australia- but before I can do that, I have to wrap this up.)
Installing the shiny new crate motor in the van was an interesting process. The obvious task was the work to be done with removal of the old engine. But there were also parts to be transferred or installed on the new engine. And waiting for Arizona Transaxle to complete the work on the transmission. And finally, we decided to install the Big Shot shifter at that same time. Each of these changes had to work together in timing as well as precision alignment. They did not.

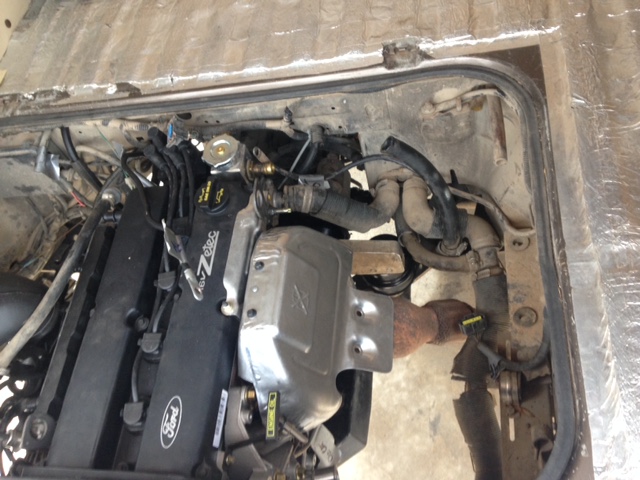
The engine removal was seamless. Mike was able to get it out and remove all the parts he needed for the next motor. We were later able to find a buyer for the first Zetec engine and it has a new home in Tucson, Arizona.

Transfer of parts to the new engine went pretty well. He transferred the alternator, and the high capacity oil pan. The pan was showing some serious signs of wear and tear- but it was solid and sealed while using it. It is solid and sealed again on the new motor. This transfer also turned out to be problem free. It is a time consuming process to install the high capacity oil pan from Bostig… but not difficult.

We chose the extra step of taking the transmission to Arizona Transaxle to have a peloquin torque biasing, limited slip differential added to it. This could have been a simple matter of waiting for the service to be completed. But “murphy’s law” kicked in and a series of events caused it to take nearly a month longer than anticipated. So we waited for Arizona Transaxle to work their magic.

We really should have had the limited slip added when we had the transmission was rebuilt about 2 years ago (also by AZ Transaxle). But we thought we would save a few bucks and skip it. Now we will encourage others to find the funds and do it right the first time! So, message to anyone looking at a rebuild—install the peloquin!!

The final change that we made was to install Ray Millers notorious Big Shot shifter. This is a beautiful looking unit, which puts a tighter shift, and a metal linkage into the hands of the driver.
Mating the engine and transmission is relatively easy. The next step involved installing the entire unit to the vehicle. There are 6 bolts that attach the engine cradle to the Westy and 4 transmission mount bolts. With a friend, an engine hoist, and a floor jack, it took approximately 2 hours to have it all hooked in. The next step is to reinstall the wiring harness. This is the magic of the Bostig unit. It is simple, complete and works wonderfully.

We then spent a few days testing and adjusting the motor. During the short trips around town we were reminded that vibration could be an issue on the Bostig unit if you do not pay attention to some details. After several adjustments we had an amazingly smooth, quiet and powerful unit.

Now to a longer test run. We were headed to Busses By the Bridge for a final distance-test run. That drive to the west side of AZ is about 4 hours from where we were doing the install. This would be a hearty test of the system. I had tools and electronics with me.
After about 1.5 hours the Check Engine Light came on (yellow light, installed with first Bostig). I never had this happen before. Since I had the Ultra Gauge set up which was not indicating any issues we checked all fluids, temps and wires and then decided to proceed. I figured that I might have accidently cut into the wire, missed a connection or something had wiggled loose.

Further down the road we ran into a huge pickle. The transmission was popping out of fourth gear. AAAGGHHHH. Now I have had to adjust the linkage. I know how to do it. But for the life of me I could not get things to adjust correctly. As mentioned, we had recently installed the Big Shot shifter, so that was one potential culprit. And we had recently installed the engine/transmission back into the van. Perhaps something was wrong there. After about 25 pop-outs and 15 different adjustments on the side of the road, I said “enough”. We found a desert site to camp for the night and then made our way to Phoenix to meet with Ray of Big Shot shifter. He worked some magic but to no avail. We still had a popping fourth gear.

We then headed back to our shop to continue work on things. First I addressed the check engine light- it was simply that the speed sensor that was misaligned. Then I removed the new shifter and reinstalled the original shifter unit to see if that was the problem. Nope, still popping out. Bill at AZ transaxle told me that I had to increase the throw on the linkage. He also invited me down to adjust the transmission in his parking lot. I moved the whole unit forward approximately an inch, using a different set of boltholes for the transmission. Then since I was at wits end, I took him up on his offer. I headed the van towards Phoenix again.
Of course, driving to Phoenix this time I had no shifting issues. He adjusted the linkage and replaced a seal that did not set correctly. I took it out for about 2 hours of testing. NO POPPING. Maybe I could get it to pop while returning home. Nope. Runs absolutely great and stayed in gear for the entire 100 miles. We arrived home to a slight snowstorm.

So ultimately I do not know if I fixed the linkage before we went down to Phoenix or Bill fixed it in his parking lot. But, I don’t care. The shift linkage is fixed and I reinstalled the beautiful Big Shot shifter with no issues!
So we now have Alta all ready to do some major miles, with a brand-new, clean, shiny, Zetec crate motor- a Big Shot shifter and a limited slip rear diff. It is great to be back in the van again. Bring on the adventures!


Nice to follow your progress. Your old Zetec will actually be inside my van soon, as I was able to get onto the Bostig wagon sooner than expected, to replace my freshly rebuilt WBX.