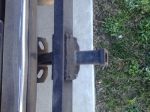
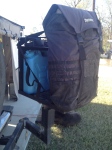
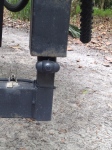
This unit began as an original Vanagon bumper and a basic receiver hitch welded to the frame. Then we found an old-style GoWesty hitch mounted swing-away bumper. Finally, we added an Aluminess box. All of these pieces evolved into what you will see in the photos below. Many trips to the welder and several different “do-overs” later we have arrived at a chaotic contraption that works for us.
This contraption on the rear of the van now hauls the following items-
- Spare tire (BF Goodrich on Mercedes rim)
- Stand-up-paddleboard with paddle in Trasharoo (Saturn brand inflatable)
- 5 gallons of water (Sceptor brand jug with wide mouth)
- Awning enclosure room walls in dry bag (room made by Butte Canyon Canvas, see post elsewhere on this blog) (dry bag by Mountainsmith)
- Solar shower bag (heating small amount of water for doing dishes)
- Bike rack for two bikes (Yakima, Craigslist)
- Bikes (Gary Fisher and Royce Union beater-bikes, Craigslist)
The original receiver hitch was welded to the frame, just behind the stock bumper. The entire bumper contraption was designed to slide into this receiver.  The first receiver now has a fan belt shield drilled into it.
 Because we have a Bostig engine, the belt and engine pulley are the lowest point. We were shredding belts after we went through water crossings, so Mike devised this shield (from VW bug engine tin) to help keep small rocks off of the pulley. So far it has worked. In these photos you can also the hitch welds that form the attachment point of this unit to the frame. There are additional reinforcement points at each end of the bumper that we added later to manage weight and wobble issues.
The bumper was purchased on Craigslist and looked a little different when we got it. This was the original GoWesty hitch mount bumper style, they sell a different version on the website now. First we reversed the tire carrier and tray location.  These two features were also much lower and closer to the bumper. The location obscured too much of the tail light, so we modified them. We had steel boxes welded on to raise them up higher and increase visibility of the brake lights.
The driver’s side holds a spare tire and rim.  The passenger side has an expanded metal tray with an Aluminess box sitting on it.
  We did have to cut this a bit to make it fit. Inside the Aluminess box is a water jug (see post elsewhere on this blog regarding using this water for a hot shower or click on this link to open in a new window http://slowcarfasthouse.com/2015/03/20/hot-water-to-go/)
  and the gray Mountainsmith duffel shaped, dry bag containing the awning enclosure room (see post elsewhere on this blog regarding the room enclosure).
Sitting beside the box but still on the tray is a Trasharoo http://store.adventuretrailers.com/products/Trasharoo-Garbage-Container.html  We use our Trasharoo to hold our inflatable stand up paddleboard. This SUP is by Saturn and is one of the most fun items we have with us! http://www.boatstogo.com/inflatable-paddle-boards-SUP330-365.asp It airs up quickly and holds air perfectly. Once inflated you can barely tell that it is inflatable vs. fiberglass. It has d-rings along the side that can support a kayak seat or two. The dogs love riding with us on the board.
The bumper has swing-away connections at each end.  These allow the bumper to swing wide open for access to the rear hatch. When closed these connections can be latched in place and secured with a lock.
  When opened up, the two arms create a partial enclosure that rests just outside the shower stall (see post elsewhere on his blog regarding shower room or follow this link http://slowcarfasthouse.com/2015/03/20/hot-water-to-go/ )
The GoWesty bumper has a receiver hitch welded to it.  We inserted a bike rack in that receiver. The bike rack is a Yakima that offers the option of lowering the arm without removing the bikes. This means that we can swing open the two sides of the bumper and open the rear hatch, but leave the bikes mounted on the rack. This is a great feature when we want to circulate air in the van for the night.
  However, the bike rack has some wobble in the receiver hitch point when going down the road. We stabilize the bikes by running a cam strap to the Aluminess box. This prevents highway wobble, which scares the folks behind us.
We also have a rear view camera mounted to one leg of the bumper. You can see the cable wrap and camera in this photo.  The screen sits on the dash to the drivers right. It is illuminated at night by a switch operated, white light mounted on the original bumper. That light can serve to light up a work space, or as a reverse light.
This chaos of the rear bumper is functional and useful. It also serves as a protection barrier- as the amount of steel and stuff between the back of the van and the next car is excessive. We are hopeful that we never test the strength through an impact, but if it happens—I believe that the car will suffer quite a bit of damage!
If you need additional info on anything I have mentioned here, please send me a note. As always- do not attempt this at home and construct such chaos only with the use of licensed professionals. Do not ride without a helmet and always wear sunglasses during nuclear test blasts. Thanks for reading and following along.

Boy, there really is a lot of stuff going on back there!!!
Mom, Sent from my iPad